Saturday, June 23, 2012

Florida weave update

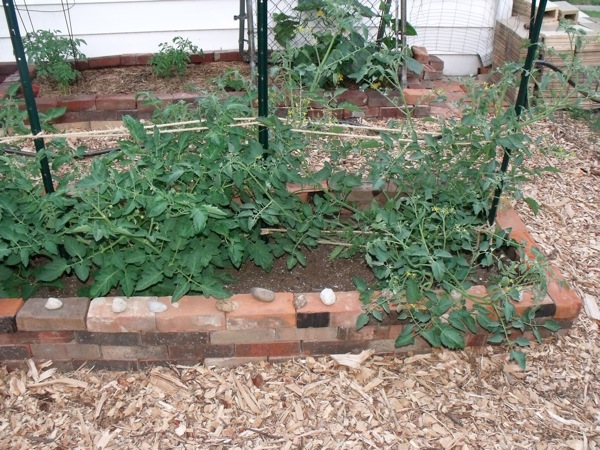
As promised, I wanted to give you an update on the Florida weave that I'm using for my tomato plants. I used it in the bed with four roma tomato plants and one grape tomato plant. Of all the tomato plants I have this year -- and there are many -- it turns out that the grape is the only one that is perfectly unsuited for a Florida weave. The tag doesn't say that it's indeterminate, but it is definitely a vine and not a bush. It's already getting sprawly and out of hand and it's not even very big yet. I'm hoping to investigate this weekend and see if it would be possible to either stuff it into a traditional cage or add two stakes on a perpendicular axis and wrap twine around the four to make a sort of string cage. Something must be done, for sure.

The weave seems to be working well for the roma plants, though at this point they'd be fine without any support at all since they're so far shaped like low, closely-growing bushes. I'll keep an eye on those and see if the weave ends up being useful later when they're bigger. The weave would be good for my Brandywine, cherry varieties, or any of the unknown volunteers I have, which are shaped in what I think of as the traditional tomato way, bushy but tall and in need of support. Next year I think I'll plant slicers and cherries in the long bed with a weave and put the romas and any grapes we plant in the side beds with cages as needed.
DSCF0206
The rest of the garden is growing like crazy with daily watering.
DSCF0201
The half-assed string trellis here is already sagging, so I'm hoping to replace it with a traditional wooden ladder trellis. I'll re-use the stakes and twine to help shore up the sprawly grape tomato plant.

DSCF0204
The cucumber is climbing the gates quite nicely!

DSCF0207
DSCF0208
DSCF0214
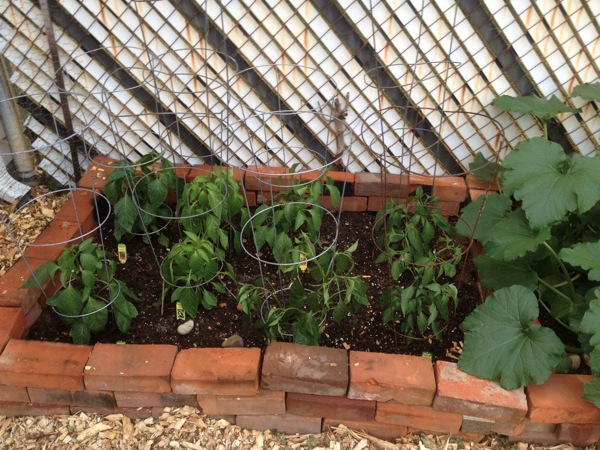
bell, sweet banana, and serrano peppers

DSCF0210
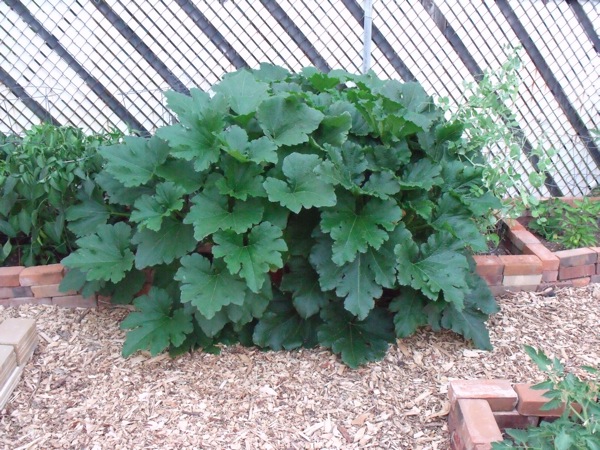
zucchini takeover!

DSCF0218
seriously freakish zucchini…I gave two away at work

DSCF0213

Wednesday, June 13, 2012

Just when I thought we were done

I figured we were finished with major garden additions for the year and then I went to work one day last week and found two tomato plants on my desk. One of my coworkers had brought them as a gift for Nico, so of course I had to find a spot for them. This past Sunday I got another carload of bricks from the free brick lady, dug out the last of the giant tansy plants, and added the supposedly-last raised bed section. Nico and I went to get dirt on Monday and planted the tomatoes yesterday evening. I have learned my lesson…I'm not going to say we're done for the year this time. Just in case.


IMG 5003
giant tansy plants (seriously, don't plant these unless you're okay with them taking over completely)


IMG 5056
IMG 5062
The left is a chocolate cherry tomato plant and the right is a Ferris Wheel.

IMG 5006
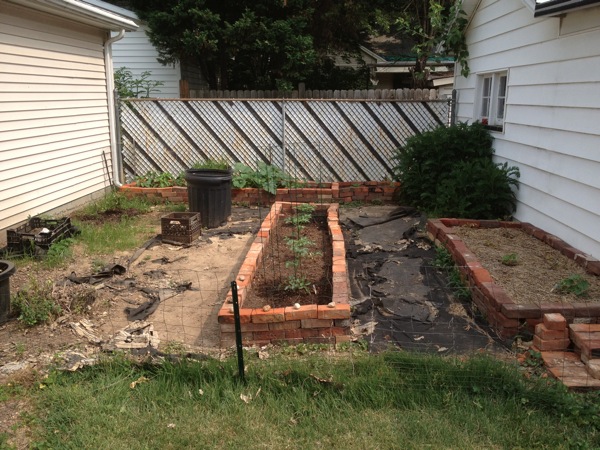
whole garden, taken before we put in the dirt and plants


IMG 5066
gourds and blackberries…big change in only ten days!


cucumbers climbing
cucumbers starting to climb


IMG 5050
He kept calling this giant zucchini leaf his "green flower." I guess we need to work on plant anatomy.


IMG 5074
Hose

Saturday, June 2, 2012

crowd control

I was google chatting about gardens with evil ducky the other day and mentioned that I needed to get some big tomato cages for my tomatoes. She told me that she's trying the Florida weave method with hers and sent me this helpful tutorial:


I thought it looked like a great option for my long raised bed with the single row of tomatoes down the center, so I set it up today. I used 5-foot T stakes and 1/4" sisal twine from Rural King.

IMG 4925
IMG 4926
IMG 4927
I bought two 50' balls of twine and used one entire ball. I'll probably only have room for two more lines of twine, so one more 50' ball should do it. I have my brandywine and black cherry plants in the back bed set up with the triangular cages I bought back in 2009. I liked them then, but am finding they haven't held up very well. They're hard to set up and keep hooked together, and I'm not convinced they'll bear weight well when the plants get huge. Time will tell, I guess, just like with the Florida weave. If any of my four volunteer tomato plants survive, I'll have test plots for three kinds of containment options, as my dad gave me seven big traditional round cages he had stored in the garage from my parents' gardening days, many years ago.

While I was working on plant containment, I also assembled a string trellis for my blackberry plant. I'm not sure it's going to hold up well over time, but if not I can replace it with a traditional ladder trellis next year.

IMG 4935
I also set up the cucumber gates, though it was probably a little early to do so:

IMG 4932

Some photos to show off how much the plants have grown - I probably should thin out that overcrowded zucchini bed, but I can't bring myself to dig out a healthy plant.

IMG 4928
IMG 4929
IMG 4933
IMG 4930
I'll keep you posted on how the Florida weave works out. Oh! And we have our first green tomatoes, on the grape tomato plant. Hooray!

IMG 4934

Thursday, May 31, 2012

First harvest!

First, an update on the wood chips. We used about half of the pile ourselves on Friday. Then some friends of ours came and took two van loads away over the weekend for their own yard, ingeniously (I thought) bagging the chips in lawn bags to eliminate a mess in the car. After that I posted an offer on freecycle and craigslist and didn't get any takers, so on Sunday I bought some posterboard and put up a sign in the front yard that said "FREE WOOD CHIPS" with an arrow pointing back to the driveway. I put a second sign on the pile itself that said "FREE WOOD CHIPS (tell all your friends!)" On Monday, our neighbor from down the street showed up on his backhoe tractor and hauled about half the pile away over the course of the morning. As if by radioactive decay, half of what was left had disappeared by the time I got home from work yesterday. Since it was supposed to rain today and there were barely three full wheelbarrow-loads left, I shoveled up the last of it and added it to our mulch pile yesterday evening. I'd definitely say the $1.40 I spent on posterboard was worth every penny to get the garden finished out with wood chips this year! I forgot to mention this in the last post, but we did lay landscaping fabric (which we already had in the shed) down before we put the chips in the garden. We didn't stake it since the weight of the chips will hold it, but I wanted the chips to have help holding back the grass. I didn't put fabric in the bottom of my raised beds before I added dirt, and that was a mistake. I have to pull grass sprouts out of the pepper bed and blueberries almost every day. I may have to move the dirt around and stuff fabric underneath next year before I add plants, so my advice is definitely to line the bottom of your beds if you're building them in a weedy or grassy area.

We got our first harvest already this year, although really it wasn't much to brag about. I picked one pepper from the red chili plant (Though it was not red and I actually picked it by accident…I was trying to move the pepper out from the dirt and it snapped off. It's probably not ripe, but hopefully it'll be edible.) and we had one teeny strawberry on one of our three remaining plants when we got back from vacation. I let Nico eat that and though he didn't seem impressed, he did ask for more once he'd eaten it. Right now the peppers, cucumber, and humongous zucchini plants all have blossoms. Everything has grown very well despite the dry conditions (no rain to speak of since planting until today), and after looking through the first photos I took tonight, I'm surprised at how big everything is already getting. Hopefully soon we'll start getting veggies and fruit!

20120531 first pepper
20120531 caged peppers
During my first year of gardening, my peppers got very tall and leggy and blew over in late summer storms. Since then I've used small tomato cages to keep them upright and steady. These cages are way too small for tomato plants, anyway!

20120531 first strawberry
First tiny strawberry! It was about the size of my thumbnail.

20120531 berry taster
Nico didn't seem that impressed.

20120531 snail shells
some empty snail shells I found while digging out the last of the big weeds on the left side of the garden so we could lay down wood chips

Saturday, May 26, 2012

Ta-daaaaaa!

Just before we left on our vacation, I emailed a guy I know through work to ask if he could recommend any local tree services that sell mulch for less than it costs by the bag. Turns out the tree services will give you tree chips by the truckload so they don't have to find a place to dump them. The chips can't be used for mulch the first year because the initial decomposition will bind up all the nitrogen in the soil and starve vegetables or annual plants, but they're fine for landscaping or filling in the spaces between raised beds. So Thursday morning I called one of the companies and was told I should get wood chips within the week. I went to the movies with my sister that afternoon and came home to this in my driveway:

20120525 mulch mountain
That's not a trick angle. It's what my husband deemed "a metric fuck ton" of wood chips. He was not wrong. For scale, here is a photo including my sainted father, who came over Friday to help me move the mulch from the mountain to the garden:

20120525 dad for scale
Nico was thrilled to have Grandpa over and followed him around "helping" for a while before the heat chased him indoors.

20120525 Nico helps
20120525 Nico helps 2
Just a reminder, here's what the garden looked like before:

20120525 before mulch
And here's the after:

20120525 after mulch
I'm so very pleased with it and feeling hopeful that our unending battle with weeds will be close to winnable this year. We plan to add another raised bed in the big space to the left of the center bed, and maybe remove the ginormous tansy plants on the right side and connect the right side and rear beds into one huge L-shaped bed.

A few more beauty shots:

20120525 left side
20120525 right side
Of course, now I'm left with the dilemma of what to do with the remaining half of Mulch Mountain, still sitting in my driveway. A friend is going to take some of it for his yard and I guess after that I'll just have to put up a big "free wood chips" sign and hope for the best. Worth it, I think!

Wednesday, May 16, 2012

The ugly garden is slightly less ugly!

Nico and I spent the evening outside tonight and I think the garden is just about done. There are still things I'd like to do out there, but we've used up the garden budget and we leave on Friday for a five day trip. Since my last update, I've put plants in all the raised beds, we added another raised bed, and I cleared out the weeds along the left side of the garden.

IMG 4604
Bed 1, peppers:  red bell, green bell, sweet banana (x2), red chili, poblano, serrano, jalapeƱo

IMG 4605
Bed 2:  zucchini, sweet peas

IMG 4606
Bed 3:  habanero pepper, Cajun belle pepper, black cherry tomato, brandywine tomato

IMG 4607
three roma tomatoes and a grape tomato plant

IMG 4610
Cutest supervisor of all time

IMG 4612
Left side cleared out, with compost stack and Nico's digging box

IMG 4613
more left side, with blueberries planted in the ground!

IMG 4617
Whole garden…still ugly, but improving!

Monday, May 7, 2012

DIY composter

I've been feeling guilty about not composting for several years. I briefly tried vermicomposting (composting with worms) the year I was pregnant with Nico, but both my efforts and the poor worms were extremely short-lived. With zero budget to put toward a nice composter, I figured we'd go another year without one.

A couple of weeks ago someone left a dozen or so stackable plastic crates at my workplace. I called to see if they were going to be retrieved, but after two weeks and no reply I figured they were fair game. They seemed like they'd be nice for storing stuff in the basement or shed, so I had my dad swing by to pick them up in his truck since there were too many to stuff into my car. As we were loading them he mused, "These would be good to put plants in, you know." Eureka, my dad is a genius! They really would work for a DIY raised bed, which might still happen. But as soon as he said that, I realized they'd also work as compost bin components.

I googled "crate compost bin" and found this tutorial for making a tiered composter out of milk crates. The internet is awesome.

I decided to use duct tape instead of hot glue to attach the landscape fabric liner, since the adhesive powers are about the same and duct tape is vastly easier to work with than hot glue. It was a simple project and took maybe an hour start to finish, and that was including the time spent stopping to take photos and switching out one of the crates for a better one. Because I got the crates for free and already had the other supplies on hand, the total cost of this project thus far is $0.
Composter 1
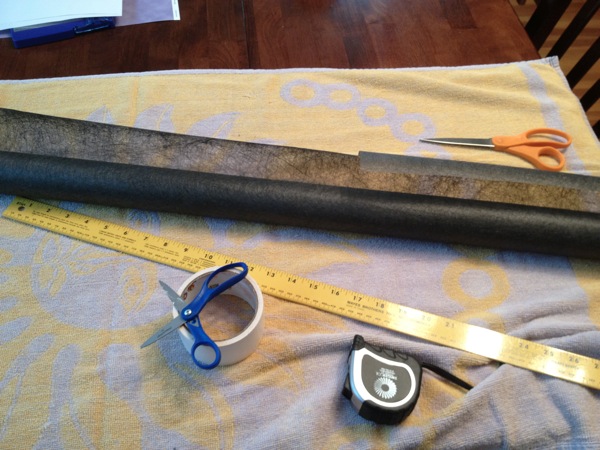
Supplies
- towel (to protect table from scratches)
- landscape fabric
- yardstick (to measure fabric)
- tape measure (to measure inside of crates)
- duct tape
- duct tape scissors (to keep sticky residue off nice scissors)
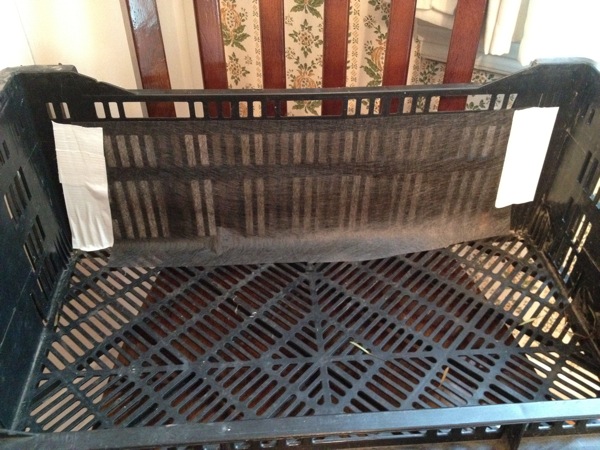
Composter 2
I taped a piece of fabric over the holes on the four sides but left the bottom open for air and water circulation.
Composter 3
First deposit! I need to add browns (dead leaves), but I was eager to get started.
Composter 4
I laid a plastic yard sign across the top for a lid and weighed it down with bricks. I'd like to try using a really long truck tie-down to secure the lid instead of the bricks, but I'll have to find one first.

According to the tutorial I followed, I'm supposed to add vegetable and fruit scraps to the top crate until it's 3/4 full. Once it reaches the 3/4 mark, I rotate it to the middle and start filling the new top crate. By the time the second top crate is 3/4 full, the middle crate's contents should be broken down enough to dump into the bottom and start the rotation again. I will keep you (com)posted. (Sorry…that was was too easy to pass up.)